$500 Off Cabinet Painting
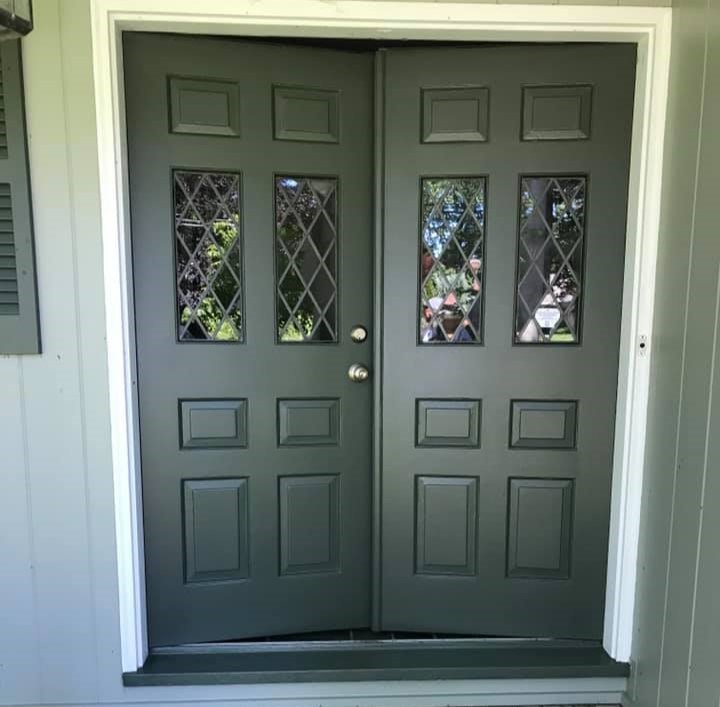
Why Paint Your Front Door?
Painting your front door is an easy and cost-effective way to freshen up your home’s appearance. A bold new color can enhance your home’s aesthetic appeal, making it stand out in the best way possible. This straightforward transformation can also reflect your style, giving guests an inviting first impression before entering.
From a practical perspective, painting your front door can protect it from the elements, preventing wear and tear. This added layer of protection helps combat the effects of sun, rain, and fluctuating temperatures, prolonging its lifespan. Maintaining a well-painted front door can be an appealing selling point if you decide to put your house on the market.
Finally, a freshly painted front door is a delightful and manageable project for homeowners looking to dabble in some DIY. It doesn’t require a significant time investment or extensive skill set, making it accessible for everyone while offering a sense of accomplishment upon completion.
Choosing the Perfect Color
Selecting the right color can be both exciting and daunting. Your chosen color should complement your home’s overall design while expressing your personality. Consider the surrounding elements—siding, roof, and landscaping—to ensure harmony with your chosen hue.
Classic colors like black, red, or navy blue are timeless and versatile, working well with most home styles. These shades provide a sophisticated look that can quickly adapt to changes in the rest of your home’s exterior. Alternatively, bold or trendy colors such as teal, mustard yellow, or pastel pink to make a statement and add a modern touch.
When choosing a color, think about the psychology behind it. Warm colors like red or yellow evoke energy and warmth, while more fabulous shades like blue or green offer calm and tranquility. Ultimately, the decision should reflect your taste and the mood you wish to convey.
Gathering Your Materials and Tools
Before painting, you must gather all the necessary materials and tools. Having everything on hand ensures a smooth and efficient process without unexpected interruptions. Begin by selecting a high-quality exterior paint for your door’s material—wood, metal, or fiberglass. Look for paint that offers UV resistance and durability to withstand the elements.
Depending on your door’s surface, you’ll need paint, primer, painter’s tape, a drop cloth, a paintbrush, and potentially a paint roller. A screwdriver is essential for removing hardware, while sandpaper or a sanding block will help create a smooth base for painting. Remember safety gear like gloves and goggles to protect yourself during the process.
For those working with a limited budget, repurposing items from around the house—such as an old sheet for a drop cloth or painter’s tape left over from a previous project—can help cut costs while still achieving professional results.
Book Free estimate now!
Schedule a free estimate with our experts at Trucoat Painting Plus to gain insights on your cabinet painting project.
Prepping the Door for Painting
Proper preparation is critical to achieving a professional-looking paint job. Start by removing hardware, such as doorknobs, locks, and hinges, to ensure an even finish. Labeling and storing these items can make reassembly a breeze once the painting is complete.
Next, clean the door thoroughly to remove dirt, grime, and grease that could interfere with paint adhesion. Use a gentle soap solution and a sponge, then rinse with clean water and allow the door to dry completely. This step is crucial for a pristine finish, as any residue left behind can lead to a less-than-perfect result.
Finally, sand the door lightly to create a smooth surface to which the primer and paint can adhere. Please pay particular attention to rough or uneven areas, ensuring they’re soft. After sanding, wipe the door with a damp cloth to remove dust particles, allowing it to dry thoroughly before moving on to priming.
Priming the Door
Applying primer is vital, as it helps paint adhere better and last longer. Choose a primer suitable for your door’s material—wood, metal, or fiberglass—and apply a thin, even coat using a brush or roller. Allow the primer to dry thoroughly per the manufacturer’s instructions before proceeding.
Priming also helps to conceal previous paint colors and stains, providing a clean slate for the new hue. It creates a uniform base that allows the paint to go on smoothly and evenly, reducing the likelihood of blotchy or uneven coverage. This additional layer enhances the paint’s durability, helping protect your door from daily wear and tear.
For doors with intricate designs or panels, reach all crevices and corners with the primer. A small brush can help ensure thorough coverage, providing a perfect foundation for your chosen paint color.
Painting Techniques for a Flawless Finish
It is important to apply paint correctly in order to achieve the best results. Start by painting the edges and recessed areas with a brush, paying close attention to detail. Use smooth, even strokes to prevent streaks or visible brush marks.
Once you’ve tackled the edges, switch to a roller for the flat, larger surfaces. Rollers provide a more consistent finish and can speed up the process, especially for doors with minimal detailing. Remember to apply two or more thin coats rather than one thick layer, allowing each coat to dry completely before applying the next.
Look for drips or excess paint, which can be gently smoothed out with a brush or roller. Be patient; rushing through this step could lead to an uneven or unprofessional appearance. You’ll achieve a stunning result with a steady hand and attention to detail.
Reassembling and Adding Finishing Touches
Once the paint has dried completely, it’s time to reattach the hardware. Carefully align the doorknobs, locks, and hinges in their original positions, ensuring they’re secure and functional. Double-check that each component operates smoothly before moving on to any additional finishing touches.
Assess the door’s appearance and address any imperfections or touch-ups needed. Minor adjustments can significantly impact the overall look, so take the time to ensure your door is flawless. Adding a new kick plate or updated house numbers can enhance your door’s appearance, elevating your home’s curb appeal.
Add a decorative wreath or seasonal embellishments to welcome guests and warmly reflect your style. These final touches can help your newly painted door truly shine, setting the stage for a warm and inviting entryway.
Maintaining Your Painted Front Door
Establish a maintenance routine for your freshly painted door to preserve your hard work. Regular cleaning with a mild soap solution can help prevent dirt and grime buildup and maintain the door’s vibrant appearance. Rinse thoroughly and dry with a clean cloth to avoid water spots or damage.
Inspect the door periodically for signs of wear, such as chips or peeling paint. Address these issues promptly with touch-up paint to protect the door’s surface and ensure long-lasting results. This proactive approach will help maintain the door’s beauty and curb appeal for years.
Weather-stripping and sealant should be checked regularly to protect against drafts and moisture. Keeping these components in good condition safeguards the door’s paint job and improves your home’s energy efficiency.
Tips for Choosing Paint and Primer
The right paint and primer are crucial for a successful front door makeover. High-quality exterior paint offers superior durability and resistance to fading, ensuring your door remains vibrant and fresh. Opt for a paint specifically designed for your door’s material—wood, metal, or fiberglass—to guarantee optimal performance.
When choosing a primer, consider the door’s existing color and condition. A stain-blocking primer can help conceal previous colors and imperfections, while a bonding primer ensures strong adhesion. To achieve the best results, be sure to follow the manufacturer’s instructions for both paint and primer.
Color swatches and samples can be invaluable when selecting the perfect hue. Test your chosen paint in natural light to ensure it complements your home’s exterior and delivers the desired effect. Take your time with this decision; the right color can significantly impact your home’s overall appearance.
Common Mistakes to Avoid
Avoiding common mistakes can make your painting project more enjoyable and successful. One frequent error is skipping the primer step, leading to poor paint adhesion and a short-lived finish. Always prime your door to ensure a smooth, long-lasting result.
Another area for improvement is properly preparing the door. Cleaning and sanding are essential steps that create a suitable surface for paint application, so take your time with them. An effective outcome can be achieved with thorough preparation.
Lastly, resist the temptation to apply thick coats of paint to save time. Multiple thin coats provide better coverage and an even finish, ensuring a professional-looking result. To ensure the best possible outcome, be patient throughout the process.
Bringing It All Together
Painting your front door is a simple yet impactful way to refresh your home’s exterior, showcase your personal style, and create a welcoming entrance. With patience and attention to detail, you can achieve a stunning transformation that enhances curb appeal and boosts your home’s value.
Following the steps outlined in this guide, you’ll be well-equipped to tackle your front door makeover confidently. From selecting the perfect color to mastering painting techniques, you’ll create a beautiful focal point that reflects your taste and dedication to your home’s upkeep.
If you’re ready to embark on this rewarding DIY project, gather your materials and start today. With the right approach and a creative spirit, your freshly painted front door will become a source of pride and admiration for years.
